
COMMENT ÉVITER L'EFFET MOIRÉ
HOW TO AVOID THE 'MOIRÉ' EFFECT
Novembre 2021 / November 2021
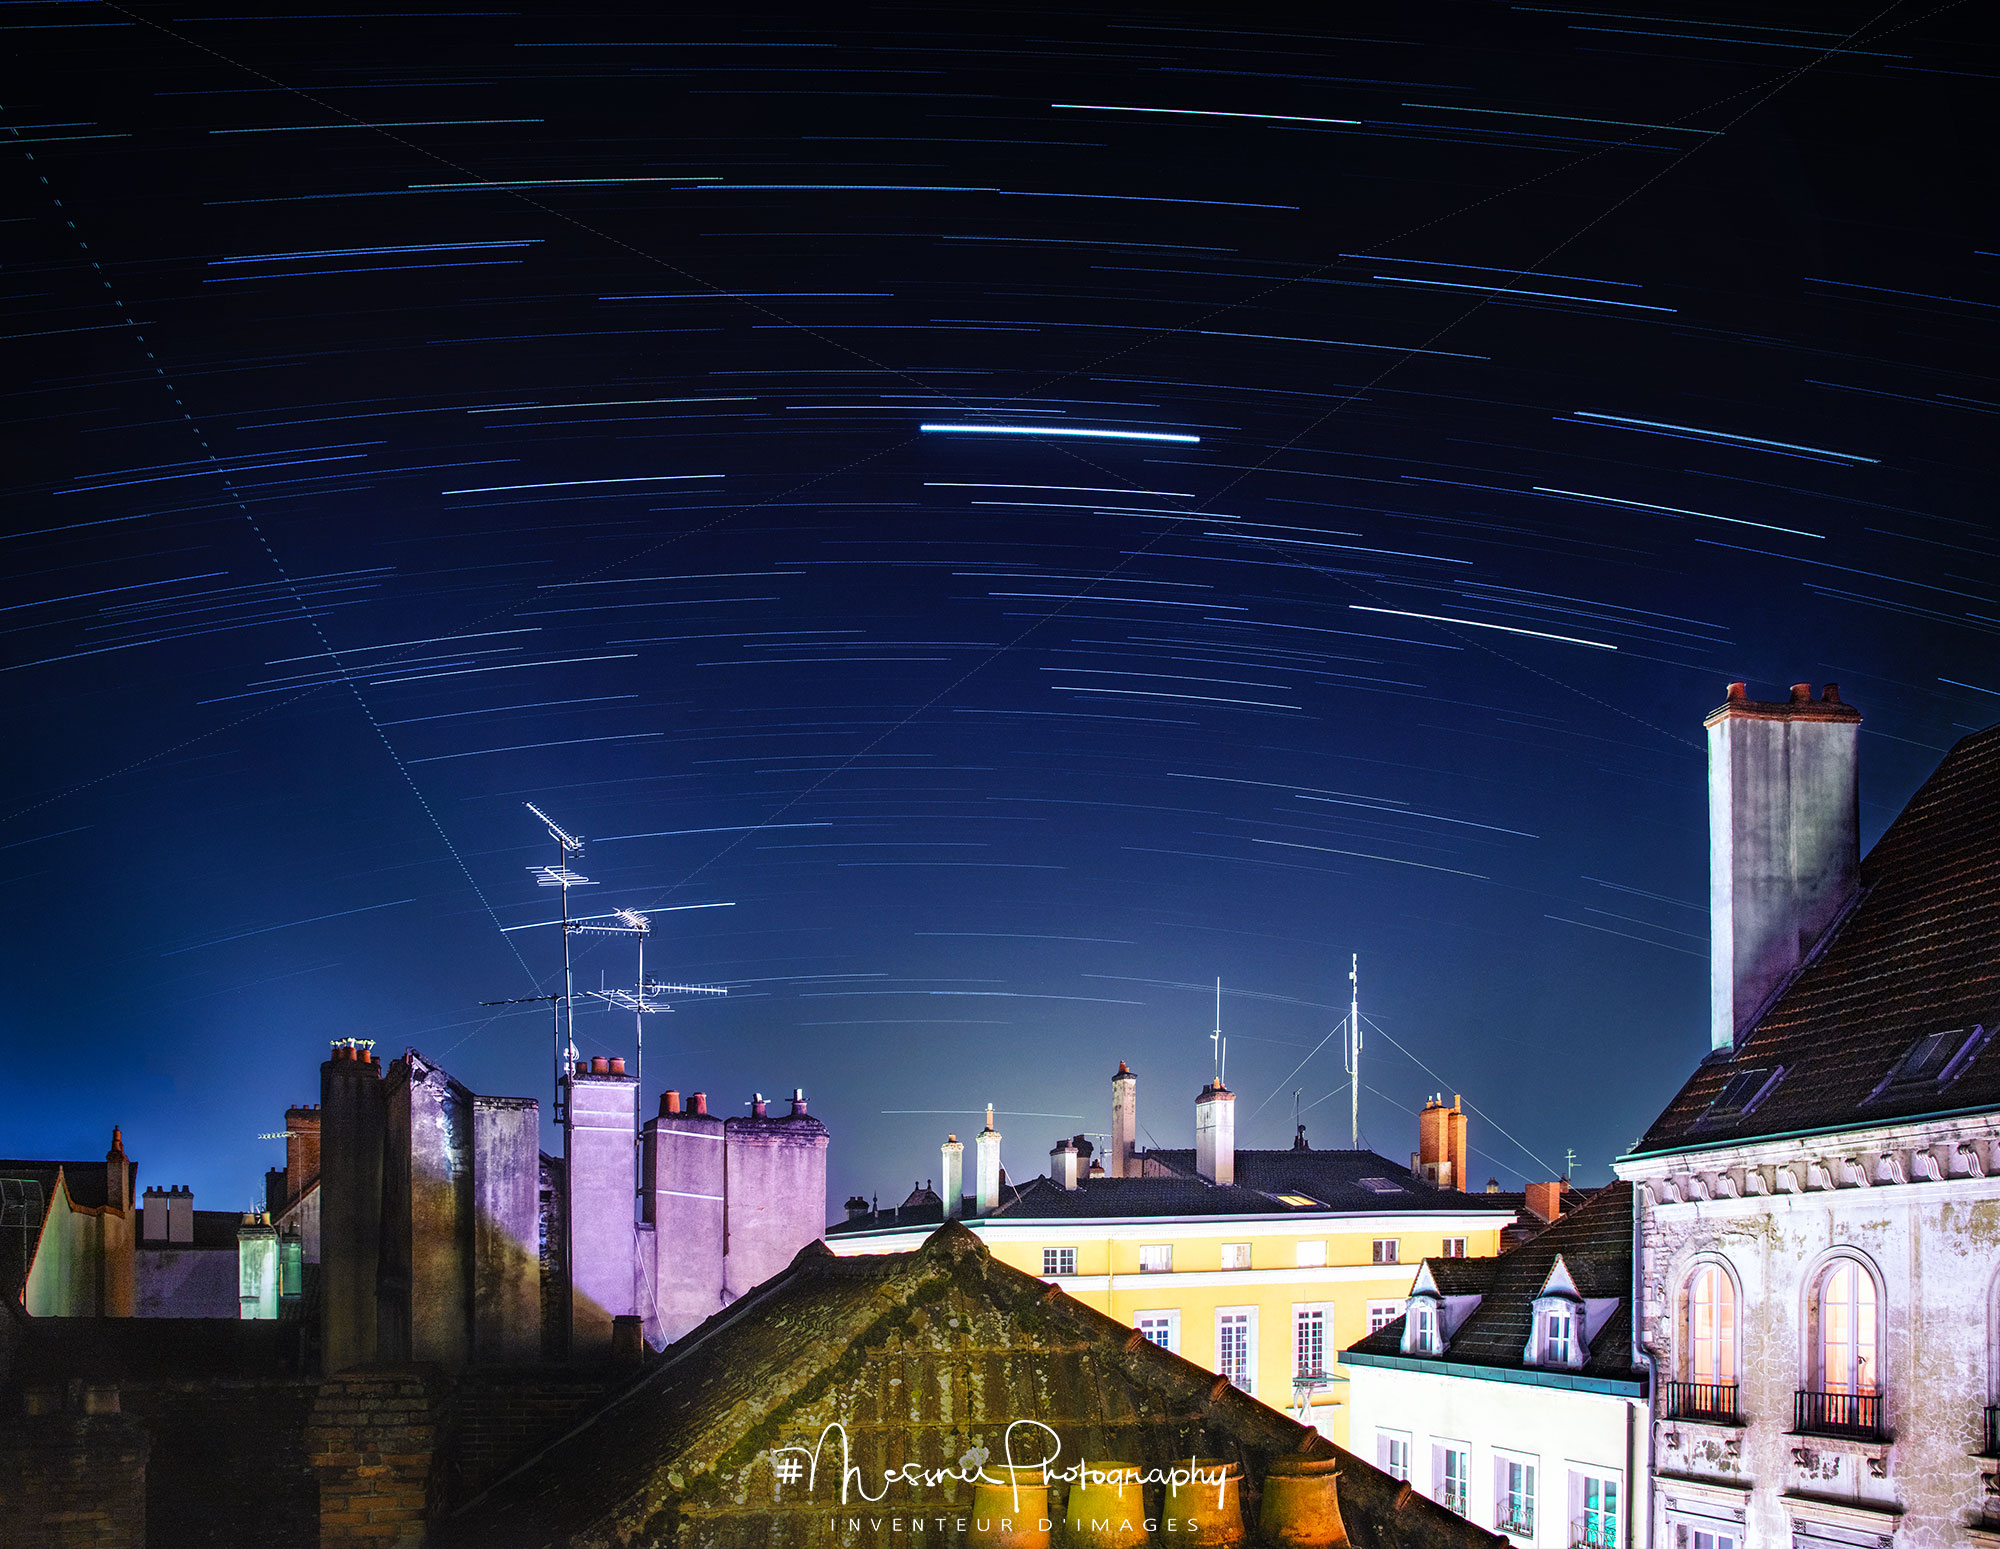
Réaliser un filé d'étoiles est un classique de la photo de nuit. Si cela peut paraître un peu compliqué à première vue, il n'y a rien de difficile en fait. Il faut juste être rigoureux et patient.
Tout d'abord, il faut un bon trépied.. ah oui et un ciel dégagé. Plus vous pointez vers l'étoile polaire (le Nord dans l'émisphère nord) plus vous aurez un effet centré et une rotation bien concentrique. En vous éloignant du nord, vous pourrez néanmoins capter la rotation de la Terre sans problème.
L'idée est de faire une prise de vue très longue (idéalement plus de trente minutes). En l'occurrence ici j'ai shooté un équivalent de 36 minutes. Mais laisser son appareil ouvert pendant 36 minutes est difficilement possible. Il faut alors faire plusieurs expositions d'une trentaine de secondes que l'on assemble par la suite en post-production, d'où l'intérêt d'avoir un trépied pour qu'il n'y ait aucun bougé entre chaque vue.
Il vous reste à paramétrer votre appareil pour faire des poses de trente seconde les unes à la suite des autres, pendant le temps d'exposition globale que vous souhaitez.
Le petit truc important à savoir et j'en viens au sujet de mon article, concerne donc l'effet de moiré (visible sur l'image de gauche ci-dessous) qui peut apparaître parfois sur la photo assemblée. Cela m'est arrivé et j'ai mis un peu de temps à comprendre.
Il faut absolement éviter de cocher 'CORRECTION DE L'OBJECTIF' quand vous préparez vos images dans Caméra Raw ou dans Adobe Lightroom. En effet, cela applique une correction à l'image qui provoque un non-chevauchement exact des clichés, d'où l'effet moiré dans l'image finale.
En ne cochant pas la corrrection de l'objectif, cela évite le problème, chaque image est strictement identique à la précédente et la suivante (mis à part le déplacement relatif des étoiles) et le rendu final est comme vous l'espériez. Vous allez en plus récupérer plus de détails dans votre images, mais surtout des détails intéressants.
Ah et les traits en travers sont les traces laissées par les avions de passage. Bon voyage!
Creating a star trail is a classic in night photography. While it may seem a bit complicated at first glance, there is nothing difficult actually. You just have to be rigorous and patient.
First of all, you need a good tripod... oh yes and a clear sky. The more you point towards the pole star (the North in the northern emisphere) the more you will have a centered effect and a well concentric rotation. By moving away from the north, you will nevertheless be able to capture the rotation of the Earth without problem.
The idea is to take a very long shot (ideally more than thirty minutes). In this case here I shot an equivalent of 36 minutes. But leaving your camera open for 36 minutes is hardly possible. It is then necessary to make several exposures of about thirty seconds each (72 in my case) which are then assembled in post-production, hence the interest of having a tripod so that there is no movement/vibration between each shot.
All you have to do is configure your camera to take thirty second exposures one after the other, for the overall exposure time you want.
The important thing to know and I come therefore to the subject of my article, concerns the moiré effect that can sometimes appear on the assembled photo. It happened to me and it took me a while to figure it out.
You should absolutely avoid checking 'LENS CORRECTION' when preparing your images in Camera Raw or Adobe Lightroom. Indeed, this applies a correction to the image which causes an non-exact-overlap of the images, hence the moiré effect in the final image.
By not checking the correction of the lens, this avoids the problem, each image is strictly identical to the previous and the next (apart from the relative displacement of the stars) and the final rendering is as you expected. You will also get more details in your images, but especially interesting details.
Ah and the cross lines are the traces left by passing planes. Have a nice journey!
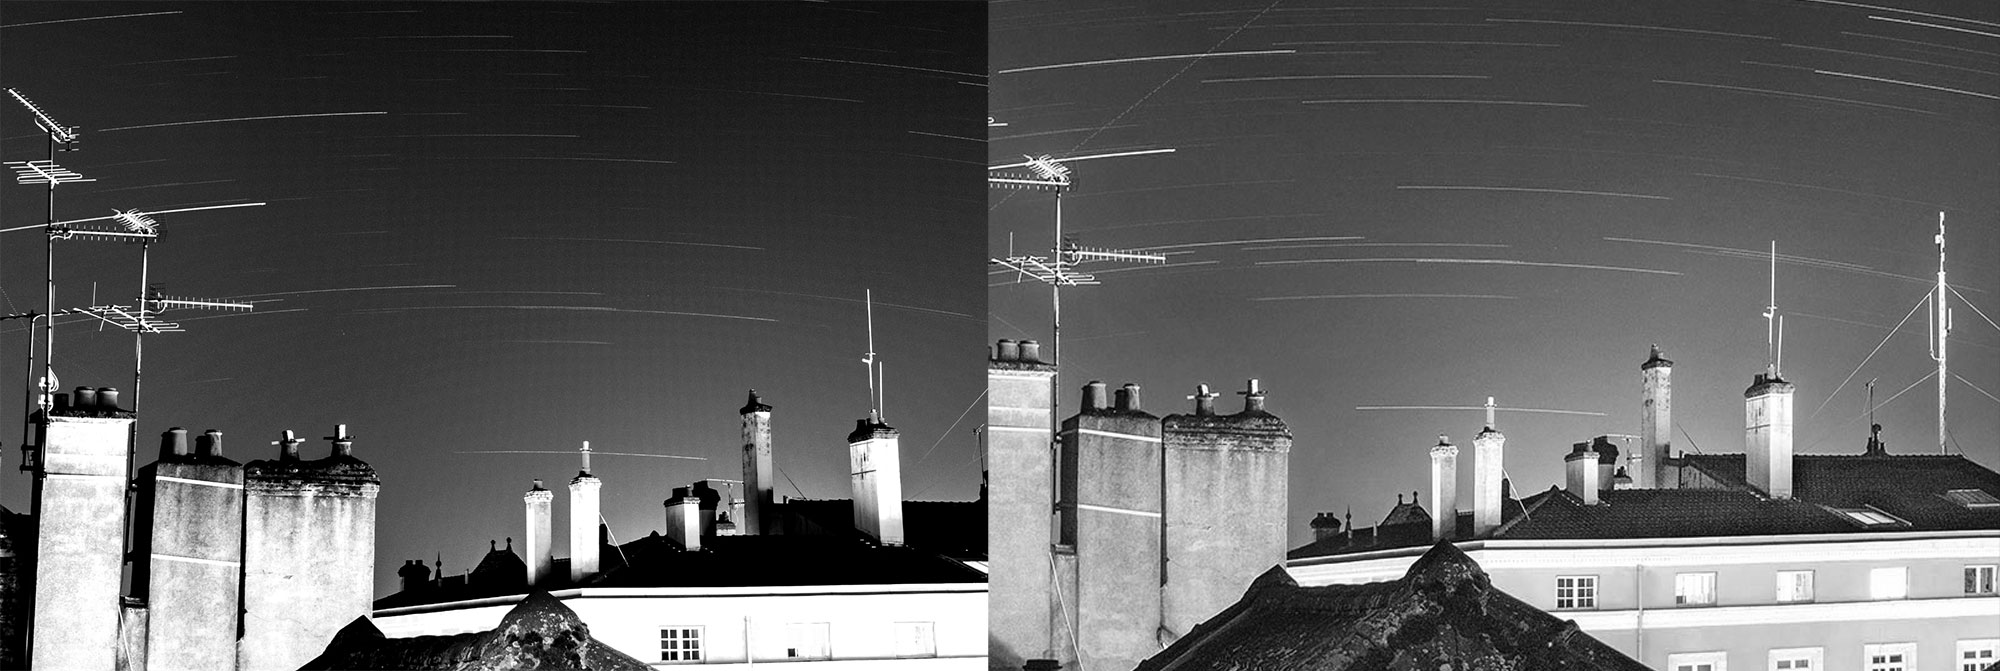
A gauche avec la correction de l'objectif cochées dans Adobe Lightroom, à droite sans la correction de l'objectif / Left with lens correction checked in Adobe Lightroom, right without lens correction.